How to take photos of forest close ups
Discover our photography top tips
Close Up Photography of Nature
Taking extreme close up photography, also known as macro photography, is a great way to capture a new perspective of nature. But showing the intricate details of wildlife in a larger-than-life way can be tricky. Check out Paul’s tips for advice on how to take the best close up photos on your hot tub forest holiday.


A close up of flower buds
Your Position and Lighting
Try to get low: “I often lie down on the ground when I photograph fungi so that I create a lovely blur effect before and after my subject. It helps the subject stand out. A plastic sheet is a useful thing to have in your camera bag to avoid getting wet and muddy.”
Use natural light: “Think about backlighting. This is when the sun shines into the camera through the subject. It works really well with leaves and creates nice effects. Try to shoot at a slight angle to the sun to reduce the light shining directly into the lens and causing flare (unless you want to do this as a creative effect). Never look through your camera directly at the sun though - you will damage your eyes!”

Beech leaves in natural light
Create your own light: “Light levels in forests are often low, in summer they can be surprisingly low. I use flash sometimes but find it difficult to always get the effect I want. I find using a torch a brilliant way to illuminate the subject but not flood the whole scene with harsh light. Torches work really well with fungi/flowers and even can help add light to insects but don’t shine it right into their eyes or you will scare them away.”
Subjects and Composition
Find interesting subjects: “Forest macro subjects are everywhere. Think about patterns such as tree bark or leaves resting on moss. Every season is different - autumn not only adds lovely colours but is the best time for fungi which make brilliant macro subjects. The main thing is to experiment and look further into your subject, a fern frond close up has amazing patterns and textures.”

A ladybird resting on a forest leaf
Capture insects: “Free flying insects like flies and butterflies can be skittish, some are nigh on impossible to photograph. However if you go slowly and keep low so your profile against the sky is minimised, you increase your chances of getting good images.”
Think about composition: “In all photography good composition is vital. It is though always a subjective thing. A good starting point is the rule of thirds. Think about the image divided into 2 lines on the thirds both horizontally and vertically. Try to put your subject on one of these lines and not in the dead centre.”
Camera Settings for Close Up Nature Photography
Learn your equipment settings: “I always shoot in Aperture Priority (Av). I choose my F number when I consider what depth of field I need. However if you have a compact it will usually have a macro setting, choose this. Depth of field is very small when using macro lenses so you often have to use large F numbers like 11, 16 or 22. The background is now much clearer so you need to be very careful. Most cameras have a depth of field preview button, try to get used to using it to check what your image looks like at your chosen F number.”
Use ISO: “Learn to understand ISO and use this to increase the speed in low light situations. Be careful though; if the ISO gets too high the image becomes grainy (called noise). Most new cameras can shoot well up to ISO’s of a 1000, some even much higher than this.”
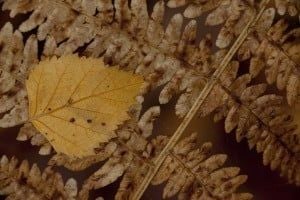
Autumnal forest leaves
About Paul Hobson: Before becoming a full time nature photographer, Paul worked at Sheffield University as an Environmental Science Lecturer. Paul has been photographing wildlife for over 20 years and is committed to raising awareness of the tremendous beauty and fragility of Britain’s wildlife. Paul has received many awards for his images and his work is regularly used in BBC Wildlife, Birdwatch and Natural World.
Find out more in our photography "How To" Series
How to take photos of nature with our post on Forest animals